Blog

  • The Pollinator-Friendly Flowers I’m Planting

    white alyssum is great for attracting pollinatorsLast year, I had trouble with some vegetable crops (zucchini and corn) because they weren’t being pollinated. This year, I’m going to have lots of flowers to get those pollinators in my garden. This is great for me, because I’m more comfortable in the flower world.

    Even though I am a flower person, I’m not so familiar with a lot of the flowers that seem to be considered traditional pollinator attractors.

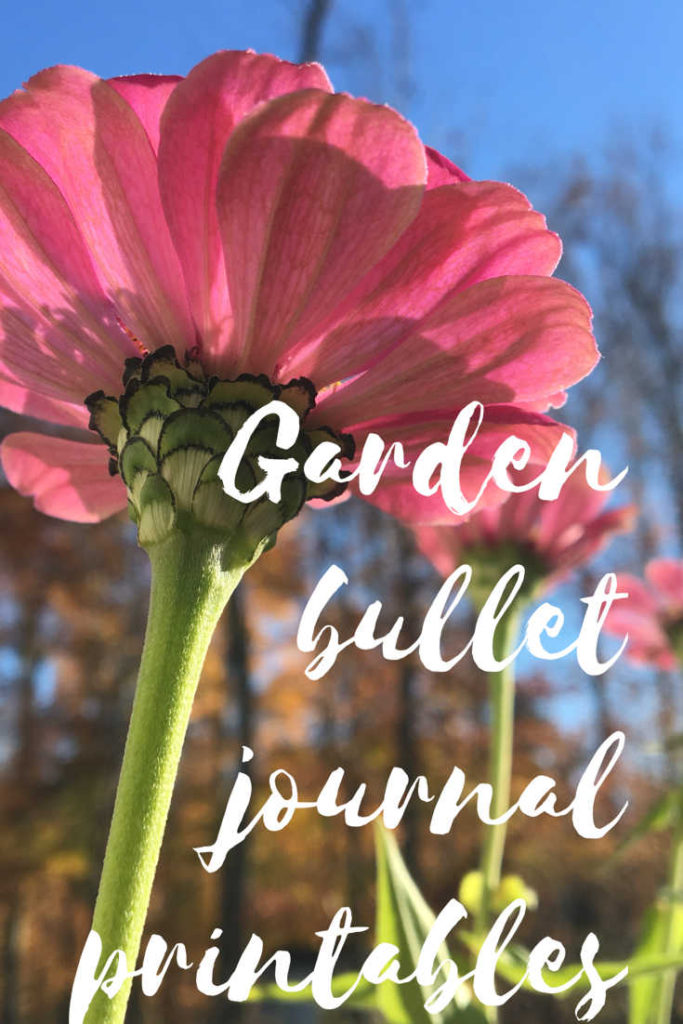
    But which flowers do the best job of bringing the bees, birds and butterflies to the garden? After doing the research, here are the seeds that I picked up with the intent of attracting these pollinators.

    My pollinator seed packs; borage; alyssum; milkweedBorage.

    What is that? It’s one of those flowers that I’d never heard of, but when I started investigating pollinators, this one was on every list. I got a packet from Botanical Interests.

    I’ll direct sow (love a direct sow seed) in my raised beds two weeks before our average last frost date. I got a tip from @libraryseedbank that borage and tomatoes get along well, so they’ll be together in my garden.

    Blue flowers – my favorite color. A few other bonuses: The seed packet also says that borage is deer resistant. And the flowers are edible, so my salads are going to be even more beautiful.

    Bee balm. Monarda Wild Bergamot.

    I don’t know why this plant has so many different names, but one of them has “bee” right in it. The packet recommends keeping them inside for six to eight weeks, so I’ll probably start them mid-March with my tomatoes and then move them outside mid-May.

    I bought a packet of Wild Bergamot from Johnny’s Selected Seeds. This perennial variety grows 36 to 48 inches tall, so I won’t put it in my raised beds but somewhere nearby.
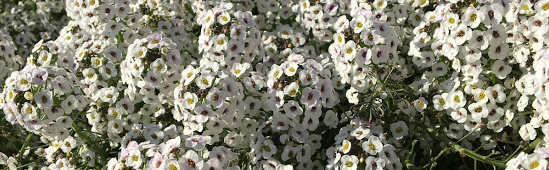
    Alyssum

    Who knew these sweet little flowers were so good for pollination? Well, not me. Another deer resistant variety, the alyssum I picked up is Rosie O’Day, a purplish-pink variety from Botanical Interests. I’ll start this annual inside, four weeks before our last frost date. It’s only four inches tall, so it won’t block the sun for any of my vegetables. Great for the ends of raised beds.

    Zinnia

    Grew zinnia last year, they were killer and I have to grow more. I have some leftover seeds from last year that I’m going to try again: Candy Cane Red On White and Purple Prince, both from Burpee. I thought Candy Cane was going to be a sea of crazy red and white striped flowers, but only some in the mix have this coloring. Purple Prince ended up being my favorite.

    I didn’t do a good job with pinching them back as they grew, so they were tall and not very bushy. I’ll put these in big planter boxes near the raised beds, but start them inside four weeks before our last frost date.

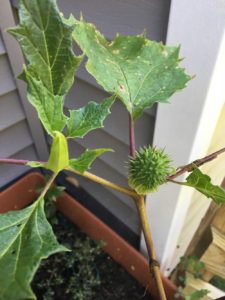
    Butterfly Flower. Milkweed. Asclepsias Tuberosa.

    It’s the Perennial Plant Association’s Plant of the Year for 2017 and it could use the publicity. Another plant I don’t feel is very well-known. And the names milkweed and butterfly weed aren’t doing anything for it, but it’s beautiful! Monarch butterflies love milkweed, so we’ll see how it goes. Another perennial. I got a packet of Asclepsias tuberosa seeds from Botanical Interests.

    Bonus Pollinator Tip

    I heard in the Encyclopedia Botanica podcast (I’m a big fan) that you should plant your pollinator attractors on the edges of your garden beds and not intermingled in with your veggies. I asked Petitti Garden Center’s Noelle Akin about this practice and she said it’s because the flowers that attract bees and butterflies can also attract the bad bugs you don’t want near your veggies. In an outdoor environment, the ecosystem will take care of itself, but best not to tempt the bad bugs too close to your plants.

  • Succulent Trees: Not Just Jades Anymore

    When rosette-type succulents get leggy and stretched, what do you do with them? Chop off the healthy rosette at top and replant it, right? Maybe take the remaining leaves and propagate?

    Well, I saw this post on Fat Plant Farm’s Instagram feed earlier this week that showed another alternative: removing the lower leaves, creating a tree form. Succulent trees! And it’s not just a jade tree that you’re used to seeing, but rosette trees.

    And they are adorable. Fat Plant Farm is calling them mini palm trees.

    It’s cute. What happens from here for these plants? Do they grow more lower leaves that you just remove? Do they grow taller and flop over? I’m curious now.

    Once I started looking for these types of succulent trees, I found a few more…


    Have you seen anything like this before? Maybe around Instagram and Pinterest? It’s new to me. Have you grown a succulent tree like this one? How’s it going? Let me know in the comments or on Twitter @howtonaturechat.

  • Create A Gardening Bullet Journal

    gardening bullet journal garden goals bugOn a Twitter chat, I once heard a gardener say that she inherited a notebook full of gardening advice from her grandmother. It was full of advice on the local growing conditions, her grandmother’s tricks and tips that she’d learned over probably decades of gardening. Talk about an heirloom! That’s information that should probably be published. A gardener would sell their favorite trowel for information like that.

    Looking back on my first year of vegetable gardening, there are so many things I feel I’ve already forgotten. I kept some notes, but a more diligent tracking of my moves in the garden would have made for a much more robust starting point for next season.

    Here’s my effort to remedy that. Have you heard of bullet journaling? It’s a note taking system that really stuck with me over the last few years. Now I’m using some of its ideas to track what I’ve done in the garden and what I want to do next.

    Garden Bullet Journal Pages

    Here’s what I have for my gardening bullet journal pages:

    Garden goals: What I want to accomplish in 2017 and how to get there. Writing them down makes them a little more real and makes it less likely that I’ll fall behind on a goal or forget it completely.

    Seed varieties/crop details: A place to aggregate all the info you find on your plants. There are slightly different variables to take note of for flower varieties versus vegetable varieties.

    Monthly calendar. I prefer a monthly calendar for the garden over daily or weekly. Dates to keep track of include seed starting, transplanting, germination, harvest and frost dates.

    Crop harvest count: A list of the crops you grew and notes on when and how much you harvested.

    To do differently next year: Here’s where I’ll make notes through the season about what didn’t turn out exactly as planned.

    Advice to remember: Be sure to keep track of all those tiny pieces of wisdom that you pick up, whether they’re from other gardeners, books or the internet.

    You can see more of my gardening bullet journal, with printable templates you can use, by filling out the form below. The printables include templates for variety notes, garden goals, a fertilizer calendar and more.

    garden bullet journal template

    Subscribe to our mailing list and receive the Gardening Bullet Journal printables

    * indicates required


    Gardening bullet journal template

    printable

  • Drip Irrigation For The Vegetable Garden: I’m Getting The Gear

    Tomato plant in raised bed
    Drip irrigation – I’ll do what it takes to keep my tomatoes happy.

    One of my garden goals for 2017 is to switch over to drip irrigation for my vegetable garden raised beds. Last year, I used a tripod sprinkler, which wasted a lot of water and left me with some disease problems.

    I’ve been pretty intimidated at the thought of drip tubes. You basically buy all the parts to make a custom hose and put it together yourself. Where’s my welding torch? Oh yeah, I don’t have one.

    So you need to make sure you have the right lengths and types of tubing. The parts have names that are extremely not self-explanatory. What’s the difference between soaker dripline and microtubing? And let’s not get started on fittings and couplings. I’m sure I’m going to punch a hole in the tubing where I don’t want a hole.

    Where Do I Start?

    I’ve started listening to and loving the Encyclopedia Botanica podcast by the Seattle Urban Farm Company, so I searched for drip irrigation on their blog to see if they had anything to say about it. I found this post on drip irrigation, in which Seattle Urban Farm Company’s Hilary Dahl recommends the Dripworks Garden Bed Irrigation Kit. Everything I need in one box? No more deciphering? Sounds good to me.

    On the product page for the kit, Dripworks has (smartly) included a how-to video, which I will be studying diligently and taking notes on. And bonus — it looks like a welding torch is not required.

    This stuff is just not second nature to me. While the video is great, there are still a few things I’m confused about.

    Backflow prevention. I hear they might be important. No idea if I need it. Websites suggest you check with your local city code to see if they’re required. Ppfftt. I don’t know who to ask — I don’t even know what to Google. I just want to grow some tomatoes! I’m not adding an addition onto my house! I skipped it for now.

    Timer weight worries. The Dripworks website recommends a high-pressure hose extension if you plan to use a timer. I’ll definitely be using a timer, but it doesn’t seem like it will be heavy enough to mess up my spigot. Anyone have experience with this?

    Distance to the beds. Another issue is that the spigot and the raised beds aren’t exactly close to each other. Does anyone bury the hose that runs from the spigot to the beds? Is that a good idea?

    Dripworks offers one of those real-time chats on its website, so that’s a good card to have in my back pocket if something doesn’t work out.

    Well, my kit should arrive next week. Another thing checked off my to-do list.

  • Garden Gift Ideas For Beginner Gardeners

    Do you have a beginner gardener to shop for this holiday season? Here are a few gardening gift ideas to generate more success in the garden or to keep a beginner gardener’s inspiration going strong through the winter.


    Roo Aprons

    Roo apron
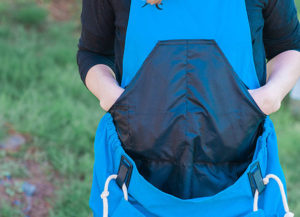
Women’s clothes do not have pockets. It makes me insane. That’s why I like the big pouch in Roo Aprons. Keep your garden tools in reach or harvest or weed away. The pouch opens at the bottom when you’re ready to empty it. And it keeps your clothes clean(er). Nice colors. Cool design.

    Roo aprons were designed by a mom who was looking to simplify things. Yes and yes.


    Some Funky Varieties To Grow

    funky veg kit plant theatreThis kit keeps coming up in my suggestions from Amazon: the Plant Theatre Funky Veg Kit. It includes Cosmic Purple Carrot, Golden Zucchini Squash, Tigerella Stripy Tomatoes, Rubine Brussels Sprouts and Rainbow Chard seeds, along with plant markers and peat blocks. Funky, right?

    The company also offers a gourmet flower kit, a psychedelic salad kit and a cocktail garden kit, among others.

    Even if these particular kits aren’t on your shopping list, offering a beginner gardener some unique and difficult-to-find seeds would always be welcome.


    Flower Of The Month Club

    White flower farm pink anthuriumPretty much a jackpot gift, in my opinion. Check out the monthly options at White Flower Farm, where you can give a houseplant, cut flower, rose or orchid of the month. Even annuals!

    The houseplant for my birthday month is this beautiful pink anthurium *cough cough*.


    Kitchen Compost Bin

    copper kitchen compost bin

    When you grow vegetables, you eat more vegetables. And you create more kitchen waste. The natural next step is to compost.

    The outdoor compost bin you use is a personal choice, but this copper kitchen compost bin would look great on any counter. I bought this one and can tell you that the includes carbon filter really works. It holds at least a few days worth of scraps.


    Grow Lights

    tabletop grow lights
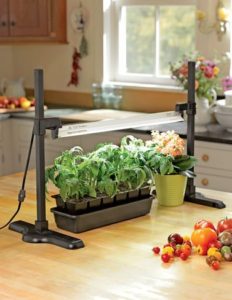
There are a lot of different types and sizes of grow lights out there, but this grow light and stand from Gardener’s Supply Company is great for beginners. Once you see how much your plants benefit from being under lights, you can get a bigger setup for your basement or work area and keep this on your kitchen counter. Here’s the one I have in my basement. Keep those plants happy during the winter!

    Great for herbs, houseplants and succulents that are 18 inches or less.


    Books. You Know, Like Paper Books.

    Homegrown Harvest by American Horticultural Society
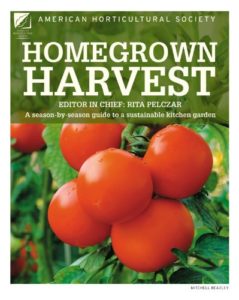
I’m hesitant to put any one book on the list because there’s no way you can fit everything you need to know about gardening into one volume. I started checking books out of the library to take what I need from each. After I borrowed this one, I tracked down a copy of this one to keep.

    Homegrown Harvest by the American Horticultural Society runs down information for each crop by season. Nice illustrations for pruning and harvesting, too. Thumbs up.


    Succulent Cuttings 
    succulent dish garden
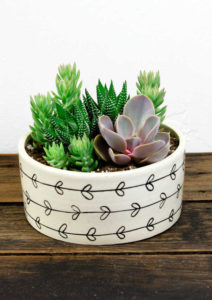
Earlier this year, I bought a batch of 25 succulent cuttings from PlantMadre and I’d say they turned out pretty awesome. You can plant them in a dish garden or wreath, or, like I did, plant them individually and see what happens next.

    For a more do-it-for-me gift, this Etsy shop also offers great planters, dish gardens and terrariums. My favorite is the heart dish shown here.


    Hose Timer

    garden timer, garden hose timerWhen they open the box, it’s not going to be sexy. When they can sleep in because they don’t have to get up to water the tomatoes — that’s pretty sexy. I still think it’s my most important garden tool. Here’s the timer I’m using from Orbit Irrigation.

    If using a timer means a jump from hand watering to the less labor-intensive methods of sprinkler or drip irrigation, a few more items will be required. Get a gift card to cover these, because again, which method your beginner gardener uses is probably a matter of personal preference.

  • Preventing Watering Problems In Hens And Chicks Succulents

    sempervivum hen and chicks
    What have I done to this poor hen and chicks? Read on to find out.

    Why can’t I get a sempervivum (also known as hens and chicks) to survive? I’ve grown succulents like jade and haworthia plants that have propagated many new plants. They’re all over my house.

    But I’d just about had it with failure after failure with hens and chicks when I reached out to Altman Plants for help. Bob Reidmuller is resident horticulturist at Altman Plants, one of the largest greenhouse operations in the United States. He looked at all the details of my situation and shared an absolute treasure trove of information with me on this succulent. It was as if I made one bad decision after another about caring for these plants, and the dominoes all fell quickly after that.

    “A common mistake with succulents is that when they start looking bad, people start giving them more water,” Reidmuller told me. “Nine times out of ten the water caused the problem in the first place and the roots are rotting or collapsed. More water just finishes things off!”

    So here’s how to care for hens and chicks properly, according to Reidmuller.

    Domino #1: Pot size. If you are growing each sempervivum in its own pot, the pot should be just a bit bigger than the plant. When the pot is too big, its enormous soil volume gets wet and stays wet. The plant and the roots don’t want to sit in damp soil for the length of time it would take for it to dry out. This is a perfect recipe for root rot.

    I did this wrong right off the bat. While some succulents may be more forgiving than sempervivums, they all run this same risk. It is better to gradually move them into bigger and bigger pots as they fill out the previous smaller ones.

    Domino #2: Drainage. Be sure that your containers have drainage holes. Otherwise, you’re going to have succulent soup and, again, root rot.

    Domino #3. Soil mix. The soil mix should be very well-draining, not heavy and soggy. You can improve your mix with Perlite or pumice.

    Domino #4: How to water succulents. When you water, do it thoroughly so the entire soil mass gets wet and water is flushing out of the drain hole in the bottom.

    “Never let the pot sit in a saucer of standing water,” Reidmuller says. “Once it has been thoroughly watered it shouldn’t need watering again for probably a week. This varies due to ambient humidity, sunlight, lots of things.”

    So here’s a trick from Reidmuller: Push a bamboo skewer or wooden chopstick into the pot all the way to the bottom and leave it there. When the stick is dry about half way down inside the soil, it’s time to water. If not, put it back in and check again later.

    “One rule of watering succulents is that if you are not sure if it needs watering, don’t,” Reidmuller says. “They will survive drier conditions longer far better than being too wet too long.” Also, clay pots dry out faster than plastic pots. Personal preference, watering practices and where the plants are growing help you decide which type of pot is best for you.

    A Better Way To Grow Sempervivum
    Growing succulents indoors is usually very difficult because of insufficient light.

    “There are some succulents that are perfectly happy spending the winter under a blanket of snow, and actually need that for optimum health and performance,” Reidmuller says. “Sempervivums are one of them!”

    Healthy sempervivum plants that are acclimated to being outdoors can be grown outside in full to partial sun all year, even in containers. In cold, rainy winter areas, potted sempervivums should be moved to a protected area (under the eaves of the house or under light corrugated plastic or something similar) to keep out winter rains. These types of overhead cover will keep the pots drier.

    So in the end, my sempervivum couldn’t be saved, but I’ll try again next year — outside with new, healthy plants.

  • 5 Things I’ll Do Differently In My Vegetable Garden Next Year

    Irrigation hose
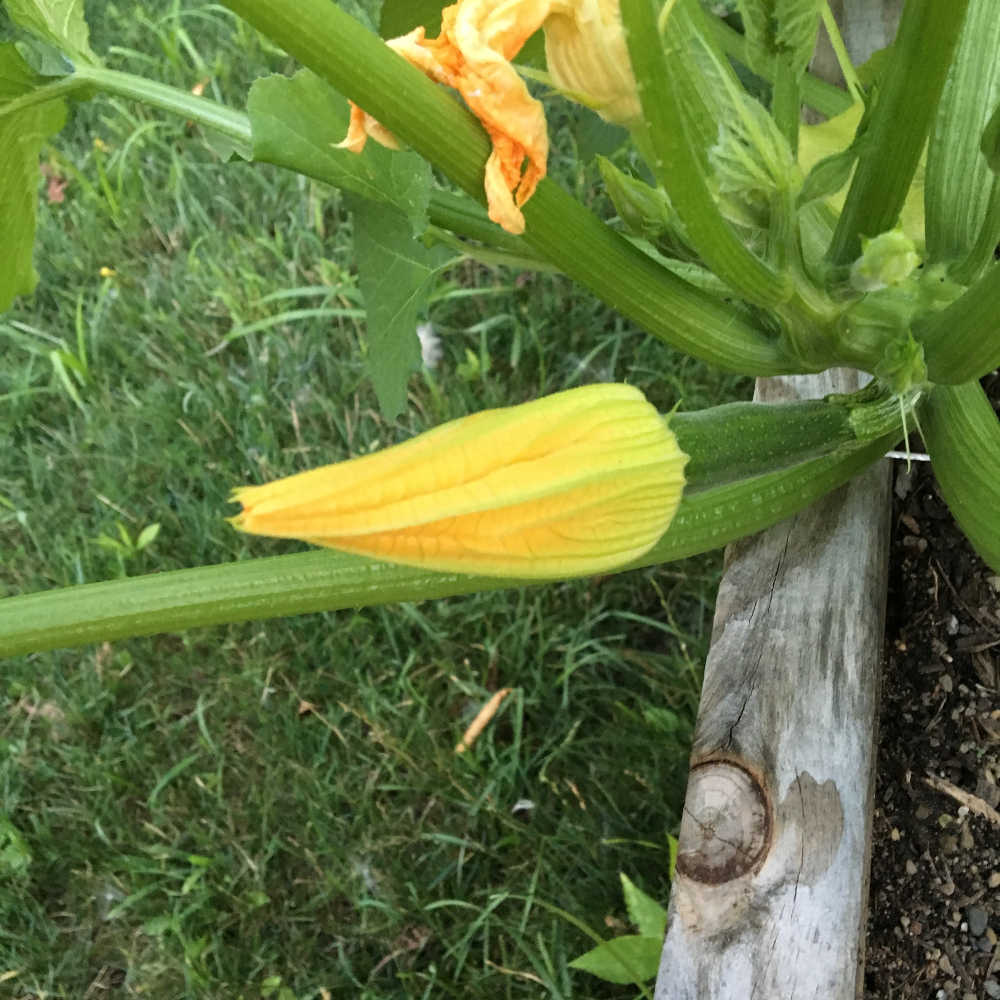
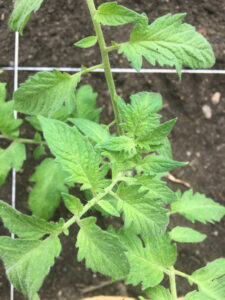
I’m in the process of finishing up my first summer of vegetable gardening and I’m looking back on quite a few successes. I started in April with seeds and I grew and harvested tomatoes, peppers and zucchini in July through September. I stopped an outbreak of blossom end rot.

    Other things I tried were pure learning experiences. I didn’t get any acorn squash or pumpkins because of a powdery mildew problem. My onions didn’t germinate. My peppers were largely crowded out by tomatoes. And my corn grew tiny little ears but not many kernels. I’m going to learn from these challenges.

    This summer has been about eating tomatoes, bell peppers and zucchini, but also about patience and observation. And about learning from things that go wrong. Mainly this:

    Now I’m onto planning for next year and thinking about what I need to research and learn. Here are the top five things that I’ll do differently in my vegetable garden 2.0 next year, most mission critical first.

    1. Drip irrigation. The overhead sprinkler I used this year got the job done, with some unwanted side effects — that powdery mildew problem. There was just too much moisture on the leaves. This method also wasted a lot of water. Next year, drip irrigation. I’m starting my research with this article on DIY irrigation systems from Home For The Harvest. We used soaker hoses once before and I think they became clogged, so I’ll be studying this a lot more.

    2. Attract pollinators to the garden. Now I get what everybody is talking about. The reason I didn’t have more zucchini this year is because they weren’t getting pollinated. And I probably also had a pollination problem with my corn. Bees, get thee to my vegetable garden.

    I have no in-ground garden beds near the raised bed vegetable garden, so this is going to take some planning. I might have some room in the raised beds for some low-growing flowers, but that space is limited. I’d rather have strong, tough perennials in the ground for pollinators to enjoy year after year.

    3. Better staking. Tomatoes and bell peppers could have used sturdier supports this year. And I bet cucumbers and zucchini would have had fewer disease problems if they were raised up away from the soil and supported better. In my square foot garden setup, I think everything would have been a little happier with good staking. Traditional tomato cages are probably out. They just didn’t give tall or sturdy enough support. I added plastic stakes to those plants by late summer.

    Traditional tomato cages are probably out. They just didn’t give tall or sturdy enough support. I added plastic stakes to those plants by late summer. These square cages look good, but require a little DIY and elbow grease.

    In my square foot garden setup, I think everything would have been a little happier with good staking. Traditional tomato cages are probably out. They just didn’t give tall or sturdy enough support. I added plastic stakes to those plants by late summer. These square cages look good but require a little DIY and elbow grease.

    4. Composting. I have all these banana peels and egg shells that I’m just throwing away. How about doing something productive with them? There are quite a few types out there. It seems that a few features I want are a tumbling-type composter with insulation (but not too much insulation) and no metal internal parts to rust. I want to get this in place this fall so I can take advantage of fallen leaves. Any recommendations, internet? Here’s a fun video I watched to get some tips.

    5. Learn about preservation and canning. I was pleasantly surprised by a big tomato harvest this summer. I wasn’t sure I’d harvest any. I grew a middle-of-the-road amount: we weren’t able to use them all in salads and BLTs, but we didn’t have enough to make a big batch of sauce for canning. And it’s a good thing, because I don’t know how to can yet.

    Let’s put it this way: I’d like to grow some fruit next year, but not until I learn how to make jam.

    Do you have advice for me on any of these topics?

    Let’s talk on Twitter @HowToNatureChat, in the comments below or by email at [email protected].

    [jetpack_subscription_form]

  • When You Accidentally Grow The Hallucinogenic Plant Jimsonweed In Your Backyard

    Datura jimson weed nightshade
    If you think it looks scary, you’re right. It’s datura, also known as jimson weed and nightshade. And I found it growing in my garden.

    I can’t be the only one who has accidentally grown a hallucinogenic plant in their yard, right? Here’s how I found out what was going on in my garden container.

    That week, the #Gardenchat Twitter chat topic was plant identification. Participants were all talking about the plants and weeds in their yards that they needed help identifying.

    I didn’t think I had much to offer to the conversation, then I remembered that weird weed that I’d let grow in one of my vacant containers. I’d figured it was just a tree sapling because it was quite woody.

    But then it grew some long, pendulous trumpet-shaped lavender-colored flowers and freaky spiked green seed pods. That was pretty weird. Not like any tree I’d seen in the neighborhood.

    So I posted a pic on Twitter, sure that it would be some super-common weed that all real, experienced gardeners recognize on sight. I felt silly even bringing it up.

    A few gardeners did recognize it, but I was not expecting the ID. It was datura, also known as jimson weed, devil’s trumpets and nightshade. If ingested, flowers and seeds can range anywhere from mildly hallucinogenic to deadly.

    I can’t believe we never saw any squirrels tripping in the yard.

    Wikipedia and #GardenChat contributors (thanks @CountryglLiz and @Denise4003) both point to birds as a possible source of this weed, carrying seeds from who knows where in their bellies and then ever-so-kindly depositing them in my yard. Makes sense, since the container is close to our bird feeder.

    So how do I get rid of it? Burning it is probably not a good idea. GardeningKnowHow says to basically treat jimson weed like a biohazard. Glyphosate. Gloves. The whole nine. Fun.

    [jetpack_subscription_form]

  • When Do I Plant Fennel, Lettuce And Spinach?

    fennel plants
    This is as close as I got to fennel bulbs this year. Maybe next year!

    Growing vegetables from seed seems like a really easy process.

    Step one: Buy seeds.

    Step two: Plant them.

    Step three: Eat vegetables.

    But watching my seeds progress/not progress to mature plants this summer and now getting ready for a fall vegetable garden has got me twisted up in knots. When I bought a bundle of vegetable seeds this spring, I was wide-eyed, eager and ready to get started. I was prepared like a girl scout to do what I was told and diligently follow the instructions.

    I sat down with my seed tray and started reading how deep to plant the seeds. Then there was all this information about frost date, transplant date and harvest date. I was a little confused, to say the least.

    Almost all packets tell you how many days until harvest and how many weeks before your last frost you should start seeds indoors, but I still had a hard time figuring out which plants would thrive in slightly cool spring temperatures and which were more suited to the hottest summer heat.

    Remember: I’ve never done this before. If they needed to be planted and harvested in early spring before the real heat came, when should they be transplanted outside? It was a mess.

    Yeah, I know tomatoes are for summer, but what about lettuce? People eat it in the summer. It must grow in the summer. And fennel? I’ve never even eaten fennel. What time of the year do you eat fennel?

    I decided to start almost all the seeds at the same time and plant them outside in raised beds at the same time — after our very late last frost date of May 15. (At least that’s when I thought it was. This article says different.) I was so worried about freezing these vegetables in a frost that I wasn’t even thinking of burning them up in the sun.

    Three of the crops were toast just after they got going, it seemed. Spinach, lettuce and fennel did not do well in even a little bit of heat. They all bolted in June.

    The Seed Packet Information Is Not Enough

    There is just not enough room on a 3×4 inch seed packet to give me all the information I need. I need a personal garden coach. Of course, I know the seed packet can’t include the information for all regions, but I still need some way to find out how to grow this romanesco.

    At the time, I was Googling the names of the individual varieties and really didn’t find much more than what’s on the seed packet. Here’s a helpful chart that I needed when I was planning and planting this spring. It shows two planting/harvesting sessions in spring and fall for crops like lettuce, spinach, kale, broccoli, beets and carrots. And it also shows the crops straight down the middle of the summer that can really handle the heat: tomato, eggplant, pepper, zucchini, potato, melons, corn and beans.

    When to plant and harvest vegetable crops in Zone 6
    Screen cap from VeggieHarvest.com. Shows the spring/fall crops vs. the strictly summer crops for my Zone 6. Click to go to the site.

    The frost free zone seems really short and sad in this chart (shaded in light green above), but knowing how to handle it helps a lot in growing vegetables successfully.

    So What Are Fall Vegetables Anyway?

    So now I’ve started five vegetables for a fall harvest. I’m not sure how this will end up. It’s all a big experiment:

    Basil. I can’t seem to grow this inside, so let’s see how this does in the fall. Last year, it was warm enough that we were still gardening on Christmas day, so I hope we have a little more time before a hard frost.

    Romanesco. A cauliflower/broccoli. I can’t even figure out which one this is! I’m pretty sure this would be considered a traditional fall crop, so let’s do this.

    Lettuce. Yes, this should work for sure.

    Spinach. Another spring/fall crop. Thumbs up.

    Fennel. Now that I’ve seen the chart in the link above, I think this is probably not the right time for fennel. But again, if it’s a long time till a hard frost, it might work.

    So the experiment continues. Do you have any advice on how to do this better? Leave a comment below or subscribe to see how these fall vegetables turn out.

    [jetpack_subscription_form]

  • Pollinators Are Super Important If You Want To Eat Zucchini

    female zucchini flower fertilized
    The lucky one. The first female zucchini flower that was fertilized in my garden this year.
    The movement to bring pollinators back to the garden is big. I’ve heard about it mainly through the concern over colony collapse disorder and the disappearance of bees from some parts of the United States. I think people generally support this movement. No one likes to hear about species in trouble, but do we really understand what pollinator decline means to us?

    I’ve planted pollinator-attracting plants like lavender and coneflowers, but honestly, that was more because I like those flowers. But planting something specifically to attract bees to our garden? That sting? And that my husband is allergic to? I would say it wasn’t a burning priority. Everything in my garden seemed to be doing just fine with the number of pollinators we had.

    And then I planted zucchini. The plants grew to be huge and lush. Leaves way bigger than my head. Beautiful green. And into August, I’d still only harvested one zucchini from four plants.

    Google: Why aren’t my zucchini producing? Was it a fertilizer problem? Not enough water? Um, no. They’re not getting pollinated. As someone who’s only ever eaten zucchini from a grocery store, this part of the zucchini lifecycle story had missed me.

    In my garden, I’d seen female flower after female flower shoot up and then die back because no bees were around to pollinate them. The moral of this story: Pollinators don’t just need us. We need them. I am embarrassed that I didn’t even think of this as a reason I wasn’t harvesting more zucchini. I’ve failed to realize how important pollinators are to us in practical, concrete terms. Another symptom of being disconnected with nature.

    There is hand pollination, of course, but there’s a lot of pretty careful timing and vigilant watching required to catch a female flower when it’s open. How about we let nature do its job? Save the pollinators! Plant zinnia, lavender, monarda, butterfly bush, sunflower, scabiosa and coneflowers in your garden, along with your zucchini. Bonus: these plants are beautiful!

    Check out Bee Better for information on what you can do to bring more pollinators (birds, bees and butterflies) to your garden. I’ll be planting some pollinator-friendly flowers closer to my raised gardens next year.